The rv lifestyle continues to grow in popularity, with over 11 million US households now owning recreational vehicles. However, with more than one-third of rvs on American roads being over 15 years old, repair and maintenance challenges have become inevitable realities for rv owners. Understanding how to handle common rv issues can save thousands in professional service costs while keeping your adventures on track.
Professional RV repair services typically charge between $130 to $220 per hour, making DIY solutions increasingly attractive for many owners. Yet the complexity of modern RV systems—from electrical and plumbing to slide-outs and climate control—requires both the right tools and expertise to perform repairs safely and effectively.
This comprehensive guide will equip you with the knowledge to tackle common RV problems, understand when professional help is necessary, and maintain your investment for years of reliable service. Whether you’re dealing with electrical failures at a remote campground or planning seasonal maintenance, we’ll cover the essential repair techniques that every RV owner should know.
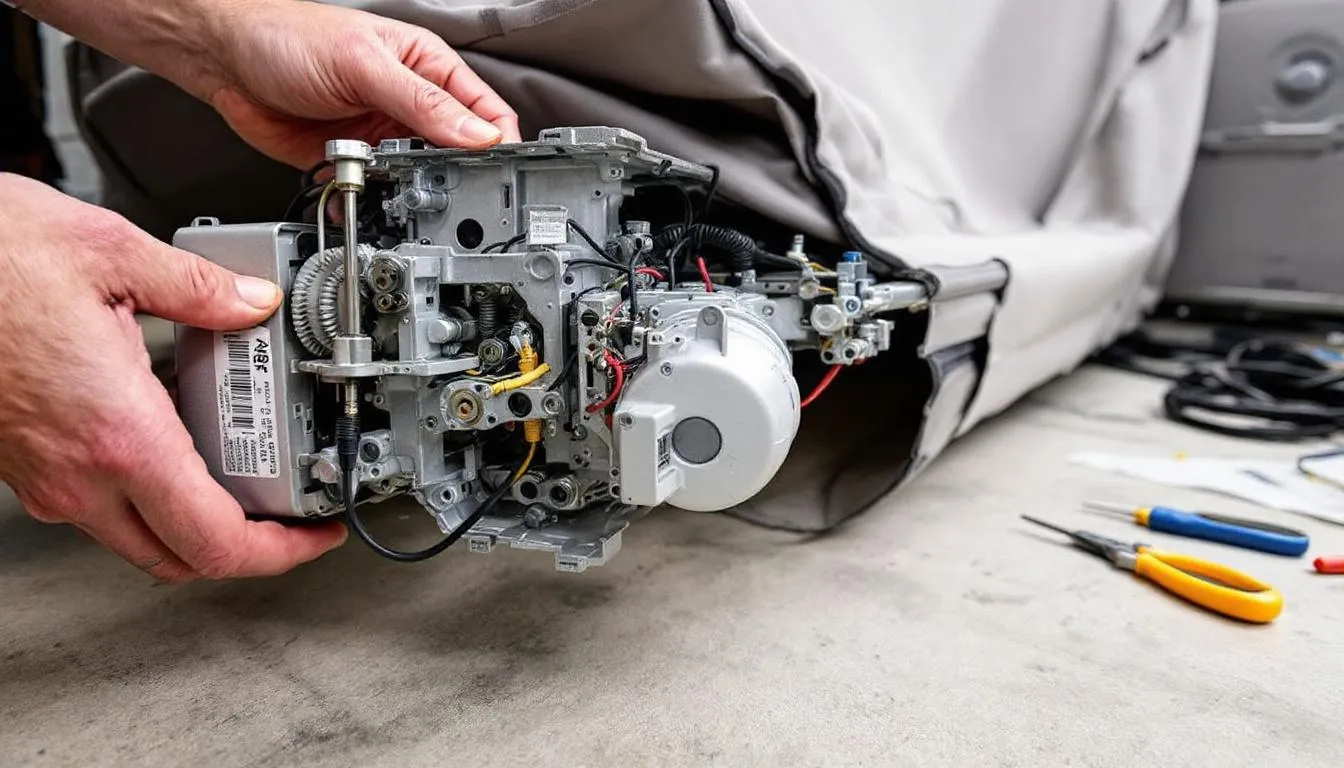
Essential RV Repair Tools and Equipment
Successful rv repair starts with having the right tools readily available. The complexity of modern recreational vehicles demands both basic hand tools and specialized diagnostic equipment to properly troubleshoot and fix problems that arise on the road.
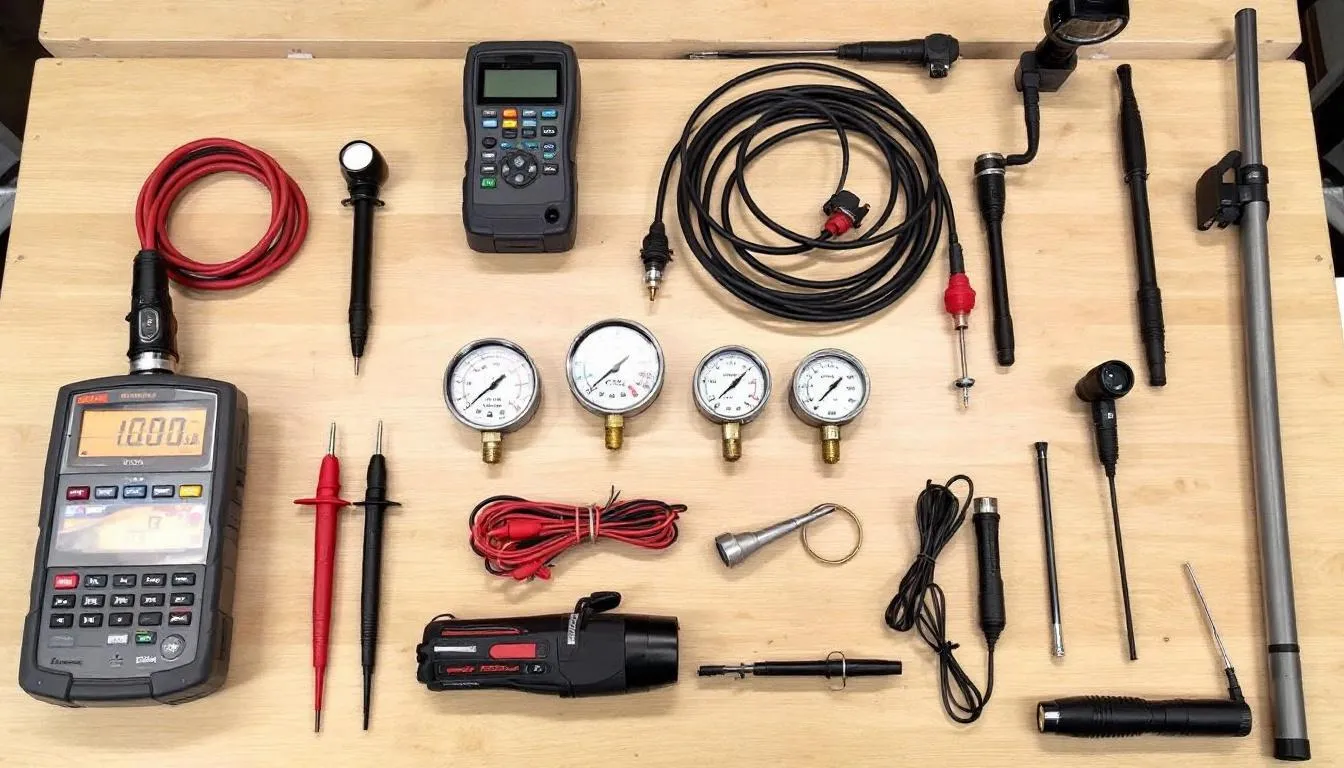
Must-Have Diagnostic Tools for RV Troubleshooting
A quality digital multimeter forms the foundation of any electrical troubleshooting toolkit. These devices test both 12V DC and 120V AC systems, measure resistance, and check continuity in circuits. Professional technicians recommend models with auto-ranging capabilities and large digital displays for easy reading in cramped spaces.
Pressure gauges prove essential for diagnosing water system problems and propane line issues. A comprehensive gauge set should include adapters for testing fresh water pumps, checking propane regulator output, and verifying proper system pressures throughout the RV.
Inspection cameras with flexible cables allow technicians to examine hard-to-reach areas without dismantling entire systems. These tools excel at locating water leaks behind walls, inspecting slide-out mechanisms, and examining electrical connections in tight spaces.
Basic Hand Tools for Mechanical Repairs
Every RV owner should maintain a complete set of metric and standard screwdrivers, including both Phillips and flathead varieties in multiple sizes. Many RV components use specific fastener types, making a comprehensive driver set crucial for accessing panels and performing routine maintenance.
Socket sets with both shallow and deep sockets accommodate the varied bolt configurations found in RV construction. Include extensions, universal joints, and ratcheting handles to work effectively in confined spaces common to recreational vehicle design.
Specialty RV tools make specific repairs much easier. These include caulk guns for exterior sealing work, pipe cutters sized for RV plumbing, and torque wrenches calibrated for proper fastener tension specifications.
Electrical Testing Equipment for System Diagnosis
Beyond basic multimeters, advanced electrical diagnosis requires circuit testers capable of checking GFCI outlets, verifying proper grounding, and testing AC voltage under load conditions. These tools help identify intermittent electrical problems that plague older RV systems.
Battery load testers determine the actual condition of house batteries and starting batteries. Many electrical problems stem from failing batteries that still show proper voltage when tested without load, making these specialized testers invaluable for accurate diagnosis.
Wire tracers help locate specific circuits within the complex wiring harnesses found in modern rvs. These tools prove particularly useful when troubleshooting problems in slide-out systems or tracking down shorts to frame that affect multiple systems.
Plumbing Tools for Water System Repairs
PEX pipe cutters and crimping tools have become essential as most modern RV manufacturers use PEX plumbing systems. Proper cutting and joining techniques prevent leaks that can cause extensive water damage throughout the vehicle.
Thread sealants and plumbing putty designed for mobile applications withstand the constant movement and vibration that RV plumbing systems endure. Standard household plumbing products often fail in recreational vehicle applications due to these unique stresses.
Safety Equipment and Emergency Procedures
Personal protective equipment remains critical when working on RV systems. Safety glasses protect against debris and chemical splashes, while insulated gloves prevent electrical shock during live circuit testing. Fire extinguishers rated for electrical and propane fires should be accessible whenever performing repairs.
Emergency shut-off procedures must be clearly understood before beginning any repair work. Know the location of the main electrical disconnect, propane shut-off valve, and water pump circuit breaker. These safety measures can prevent minor problems from becoming major disasters.
RV Electrical System Troubleshooting
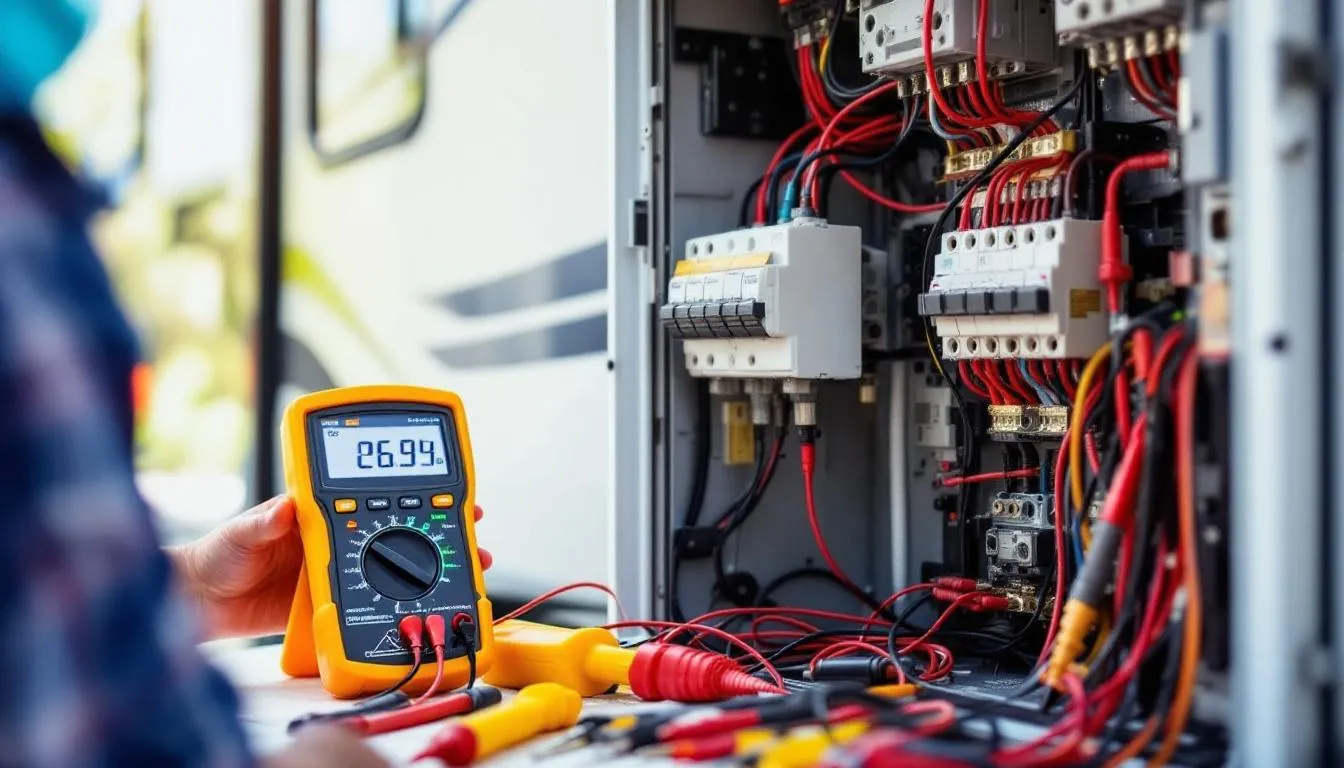
Electrical system failures rank among the most common rv issues that owners encounter, often manifesting as dead batteries, non-functioning appliances, or complete power loss. Understanding the dual 12V DC and 120V AC systems found in most recreational vehicles enables effective troubleshooting and repair.
Diagnosing Converter Failures and Power Supply Issues
RV converters transform 120V AC shore power into 12V DC current for charging batteries and powering lights, water pumps, and fans. When converters fail, batteries won’t charge properly, and 12V systems may operate poorly or not at all.
Testing converter output requires measuring voltage at the battery terminals while connected to shore power. Healthy converters should produce 13.2 to 14.4 volts during the charging cycle. Output below 13 volts indicates converter failure or internal component degradation.
Common converter problems include blown fuses within the unit, overheated transformers, and failed rectifier circuits. Many converters feature replaceable fuses that blow during power surges or when 12V systems draw excessive current. Always check these fuses before assuming complete converter failure.
Testing 12V DC Circuits for Frame Shorts
Shorts to frame occur when positive 12V wires contact the metal RV chassis, creating dangerous conditions and system malfunctions. These shorts often affect leveling jacks, slide systems, and exterior lighting circuits that route through areas exposed to road debris and moisture.
Systematic testing involves disconnecting the battery negative terminal and using a multimeter to check resistance between each positive circuit and the frame ground. Any reading below infinite resistance indicates a short condition requiring immediate attention.
Slide-out systems are particularly susceptible to frame shorts due to the flexible wiring harnesses that move during operation. Damaged wire insulation allows conductors to contact metal components, creating shorts that can damage expensive control modules and motors.
Fixing Electrical Panel Issues and Connections
Loose connections within electrical panels create resistance that generates heat, leading to burned terminals and intermittent operation. These problems worsen over time as repeated heating and cooling cycles further degrade connections.
Professional repair involves removing each wire connection, cleaning terminals with fine sandpaper, and reassembling with proper torque specifications. Dielectric grease applied to connections helps prevent corrosion in the moisture-prone environment of recreational vehicles.
Circuit breakers themselves can fail, particularly in older RV installations where repeated tripping has worn internal mechanisms. Testing breakers under load reveals failures that aren’t apparent during visual inspection alone.
Troubleshooting Inverter Problems and Reset Procedures
Inverters convert 12V DC battery power into 120V AC current for operating standard household appliances when shore power isn’t available. Modern inverters include sophisticated protection circuits that shut down operation during fault conditions.
Xantrex inverters, common in many RV installations, feature remote control panels that display error codes during malfunction. These codes guide technicians to specific problems such as overtemperature conditions, low battery voltage, or AC output faults.
Reset procedures vary by manufacturer but typically involve disconnecting AC and DC power for several minutes before reestablishing connections in the proper sequence. Some inverters require specific button combinations on remote panels to clear fault conditions and resume normal operation.
Resolving Lighting Issues and Track Light Repairs
Flickering lights in RV installations often indicate poor connections rather than bulb failures. The constant vibration experienced during travel loosens wire nuts and terminal connections, creating intermittent contact that causes lights to flicker or fail completely.
Track lighting systems present unique challenges due to their modular construction and multiple connection points. Individual fixtures can lose contact with the track power rails, requiring careful cleaning and adjustment to restore proper operation.
LED conversions have become popular for reducing power consumption, but these systems require compatible dimmer switches and proper heat dissipation to operate reliably in the confined spaces typical of RV installations.
RV Heating and Cooling System Repairs
Climate control systems in recreational vehicles work harder than residential units due to smaller spaces, varying power sources, and extreme operating conditions. Regular maintenance and proper troubleshooting techniques keep these critical systems functioning reliably throughout your travels.
Furnace Troubleshooting and Component Failures
RV furnaces combine gas combustion with electric blower motors to distribute heated air throughout the vehicle. When furnaces fail to operate, the problem often lies with the blower motor, gas valve solenoid, or sail switch that monitors airflow.
Blower motor failures typically announce themselves with unusual noises or complete failure to start. Testing involves checking 12V power supply to the motor and measuring current draw during operation. Motors drawing excessive current or failing to start indicate bearing wear or internal damage requiring replacement.
Gas valve solenoids control propane flow to the burner assembly. When these components fail, the furnace may cycle on and off without producing heat, or fail to ignite entirely. Testing solenoids requires measuring resistance across the coil terminals and verifying proper voltage supply during operation.
Sail switches monitor airflow through the heat exchanger and prevent gas flow when adequate combustion air isn’t available. These safety devices can stick in the closed position or fail to operate due to accumulated debris. Cleaning or replacing faulty sail switches restores safe furnace operation.
Annual Maintenance Procedures and Burner Service
Professional maintenance schedules recommend annual cleaning of burner assemblies and inspection of heat exchangers for cracks or corrosion. Accumulated debris and spider webs can block air passages, reducing efficiency and creating dangerous operating conditions.
Electrode replacement should occur every few years as these components erode from repeated sparking during ignition cycles. Proper gap settings ensure reliable ignition while preventing damage to control modules that generate spark timing.
Combustion air intake screens require regular cleaning to maintain adequate airflow. Blocked intakes cause incomplete combustion, carbon monoxide production, and potential heat exchanger damage from overheating.
Diagnosing Intermittent Operation and Clicking Sounds
Furnaces that cycle on and off without producing heat often suffer from low voltage conditions or faulty control boards. Testing voltage at the furnace during operation reveals whether electrical supply problems affect reliable operation.
Clicking sounds without heat output typically indicate gas valve problems or ignition system failures. The distinctive clicking of gas valves can help pinpoint whether propane reaches the burner or whether ignition systems fail to light available gas.
Thermostat issues can cause erratic operation as temperature sensors drift out of calibration or wiring connections degrade. Testing thermostat operation involves verifying proper voltage switching during temperature changes and checking for loose connections.
Air Conditioner Performance and Soft-Starter Installation
RV air conditioners struggle to start on marginal power sources due to the high current draw of compressor motors. Installing MicroAir EasyStart soft-starter systems reduces starting current by up to 75%, enabling operation on smaller generators and weak shore power connections.
Soft-starter installation involves connecting the device between the AC unit’s run capacitor and compressor motor. These electronic controllers gradually ramp up motor speed, reducing the sudden current surge that trips breakers or overloads power sources.
Performance improvements from soft-starters include quieter operation, reduced wear on electrical components, and the ability to run air conditioners on 15-amp circuits that previously required 30-amp service.
Refrigerator Cooling Issues and Thermistor Testing
RV refrigerators use absorption cooling systems that operate on propane, 12V DC, or 120V AC power. When cooling performance degrades, thermistor sensors that monitor temperature often fail, causing improper operation regardless of the power source selected.
Testing thermistors requires measuring resistance while varying temperature around the sensor. Proper sensors show predictable resistance changes as temperature fluctuates, while failed units display constant resistance or erratic readings.
Cooling unit blockages occur when ammonia solution crystallizes within the absorption system. These blockages require professional service or complete cooling unit replacement, as improper repair attempts can damage the sealed system permanently.
Installing Baffles and Improving Airflow
RV refrigerators rely on proper ventilation to dissipate heat from absorption cooling systems. Installing baffles behind refrigerators directs airflow over cooling coils, improving efficiency and reducing propane consumption during hot weather operation.
Exterior vent modifications can significantly improve cooling performance by ensuring adequate air circulation. Adding computer fans to upper vents creates positive airflow that prevents heat buildup in refrigerator compartments.
Interior modifications include installing small fans to circulate cold air throughout refrigerator compartments. These 12V fans prevent temperature stratification and improve overall cooling uniformity, particularly in larger RV refrigerators.
RV Water System and Plumbing Repairs
Water system failures can quickly end camping trips and cause extensive damage if not addressed promptly. Understanding the three-tank system design and common failure points enables effective troubleshooting and repair of leaks, pump problems, and heater malfunctions.
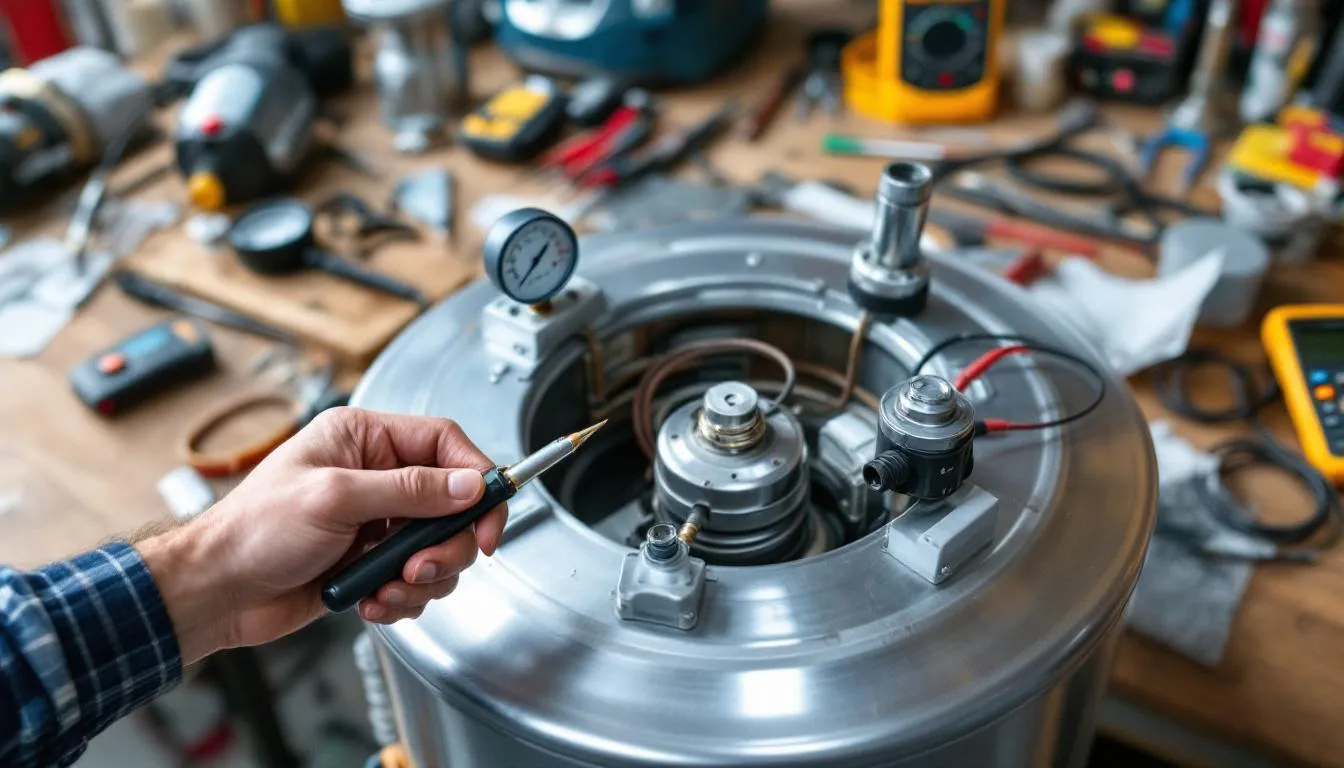
Water Heater Troubleshooting for Popular Models
Suburban and Atwood water heaters dominate RV installations, each with distinct troubleshooting procedures and common failure modes. These units operate on both propane and electric power, complicating diagnosis when heating problems occur.
Electric element failures are among the most common water heater problems. Testing involves disconnecting power and measuring resistance across element terminals. Healthy elements typically show 10-16 ohms resistance, while failed elements display infinite resistance or very low readings indicating internal shorts.
AC/DC electrical problems often stem from loose connections at the main control board or corroded terminals in the junction box. These connections carry high current loads that generate heat, accelerating corrosion and connection degradation over time.
Suburban water heaters use electronic control boards that can fail due to moisture infiltration or voltage spikes. These boards control both gas and electric operation, making diagnosis more complex when multiple symptoms appear simultaneously.
Testing Electric Elements and Heating Components
Water heater electric elements require proper voltage supply and secure connections to operate effectively. Testing involves verifying 120V supply voltage and measuring current draw during heating cycles to confirm proper element operation.
Thermostat failures can prevent electric elements from receiving power even when voltage is available at the water heater. These devices open and close circuits based on water temperature, and calibration drift or internal failures prevent proper operation.
High-limit switches provide safety protection by shutting off power when excessive temperatures occur. These devices can trip due to dry heating conditions or internal failures, requiring manual reset or replacement to restore operation.
Water Heater Maintenance and Backflushing
Burping procedures remove air from water heater systems that can prevent proper heating and cause unusual noises during operation. This process involves briefly opening relief valves while the system pressurizes to expel trapped air.
Backflushing removes sediment accumulation that reduces heating efficiency and can damage electric elements. The procedure requires specialized flushing wands that direct high-pressure water through the heater tank to dislodge accumulated minerals and debris.
Anode rod replacement should occur annually in areas with aggressive water conditions. These sacrificial rods protect the tank from corrosion, and their degradation indicates the need for replacement to prevent expensive tank damage.
Systematic Water Leak Detection Methods
Water leaks in RV systems can occur throughout the complex network of supply lines, waste lines, and fixture connections. Systematic inspection involves pressurizing the fresh water system and methodically checking every connection and fitting for signs of moisture.
Fresh water leaks typically occur at pump connections, filter housings, and fixture supply lines. These leaks waste precious fresh water and can damage surrounding cabinetry and flooring if not addressed quickly.
Waste water leaks are more serious due to potential health hazards and odor problems. Gray water leaks from sink and shower drains require immediate attention, while black water leaks demand complete system shutdown and professional repair.
Fresh Water Tank and Fill Port Maintenance
Fill port replacement becomes necessary when sealing surfaces deteriorate or internal components fail. These repairs require careful attention to sealing techniques to prevent water intrusion into surrounding structures.
Proper sealing involves using marine-grade sealants designed for potable water contact and UV resistance. Standard automotive or household sealants may contain chemicals unsuitable for drinking water systems or lack the durability needed for mobile applications.
Tank sanitization should occur regularly using bleach solutions specifically formulated for potable water systems. This process eliminates bacteria and biofilm accumulation that can cause taste and odor problems in stored water.
Installing Propane Bypass Valves
Propane bypass valves allow water heaters to operate exclusively on electric power when desired, providing better control over energy sources and simplifying winterization procedures. These valves install in the gas supply line before the water heater.
Installation requires shutting off propane at the tank and carefully routing new gas lines to accommodate the bypass valve. All connections must be tested for leaks using soap solution before restoring gas service to ensure system safety.
Benefits include the ability to isolate the water heater from the propane system during maintenance and the option to use only electric heating when propane conservation is important or when staying in locations with abundant electrical power.
RV Slide-Out System Maintenance
Slide-out systems have become standard features in modern recreational vehicles, but their complexity creates unique maintenance challenges. Understanding the different operating mechanisms and common failure modes helps rv owners keep these systems functioning reliably throughout their travels.
Troubleshooting Lippert Schwintek Systems
Lippert Schwintek slide-out systems use electric motors and gear reduction systems to extend and retract slide rooms. These systems feature individual motors for each side of the slide, requiring synchronized operation to prevent binding and damage.
H-column components within Schwintek systems include the motor assemblies, gear boxes, and support mechanisms that guide slide movement. Identifying these components correctly is essential for proper diagnosis when slides fail to operate or become misaligned.
Common Schwintek problems include motor failure, gear box damage, and control module malfunctions. Diagnosis begins with testing 12V power supply to each motor and observing current draw during operation to identify mechanical binding or electrical failures.
Fixing Out-of-Sync Motors and Alignment Issues
Schwintek slide motors can become out of sync when one motor fails or when mechanical obstructions prevent uniform movement. This condition causes the slide room to cock at an angle, potentially damaging seals and structural components.
Realignment procedures involve manually positioning the slide room using the emergency override procedures specified by the manufacturer. This typically requires accessing motor assemblies and turning manual override mechanisms while carefully monitoring slide position.
Professional alignment may require special tools to measure slide position accurately and ensure proper seal compression. Improper alignment leads to water intrusion, air leaks, and premature wear of expensive slide components.
Diagnosing Rack and Pin Style Slide-Outs
Rack and pin systems use electric motors to drive gear mechanisms that push slide rooms in and out along rails or tracks. These systems are generally more robust than cable-operated slides but can suffer from gear wear and binding issues.
Mechanical binding occurs when debris accumulates in slide tracks or when structural settling causes misalignment. Diagnosis involves checking for obstructions and measuring slide movement during operation to identify binding points.
Stuck slides often result from lack of lubrication or accumulated dirt in gear mechanisms. These systems require regular cleaning and lubrication with products specifically designed for slide-out applications to prevent premature wear.
Complete Slide Room System Replacement
Major slide system failures may require complete replacement of motor assemblies, gear boxes, or control modules. These repairs typically exceed the capability of DIY maintenance and require professional technicians with specialized tools and training.
Lippert system replacement involves coordinating multiple components to ensure compatibility and proper operation. New installations must account for structural modifications and electrical system integration to match original performance specifications.
Warranty considerations become important during major repairs, as improper installation or use of non-approved components can void manufacturer coverage for expensive slide system components.
BAL Accuslide Repair and Lubrication
BAL Accuslide systems use hydraulic cylinders and electric pumps to operate slide rooms. These systems require different maintenance procedures than electric motor systems, focusing on hydraulic fluid levels and seal condition.
Lubrication requirements for BAL systems include specific hydraulic fluids and seal lubricants that maintain proper operation under varying temperature conditions. Using incorrect lubricants can damage seals and reduce system reliability.
Repair procedures often involve replacing hydraulic seals and checking pump operation. These systems can develop internal leaks that reduce operating pressure and prevent proper slide extension or retraction.
Slide-Topper Fabric Replacement and Weather Protection
Slide-topper awnings protect slide room roofs from debris and weather when extended. These fabric coverings require periodic replacement as UV exposure and mechanical stress cause material degradation over time.
Replacement procedures involve removing old fabric from roller mechanisms and installing new material with proper tension. Incorrect tension can cause premature wear or inadequate coverage of the slide room roof.
Weather protection benefits include reduced debris accumulation on slide room seals and prevention of ice formation that can damage slide mechanisms during cold weather operation. Regular inspection and maintenance of slide-toppers prevents more expensive slide system repairs.
RV Exterior Component Repairs
Exterior components face constant exposure to weather, road debris, and UV radiation, making them among the most frequently serviced parts of any recreational vehicle. Understanding repair techniques for awnings, windows, and sealing systems keeps your RV protected and comfortable.
Awning Motor Diagnosis and Replacement
Motorized awning systems provide convenient operation but introduce electrical complexity that can fail during extended use. When awning motors stop working, diagnosis begins with testing 12V power supply and checking current draw during operation attempts.
Failed motorized awning systems often suffer from burned-out motors, stripped gears, or control switch problems. Motors that receive power but fail to operate typically have internal damage requiring complete replacement, while motors that draw excessive current may have mechanical binding issues.
Replacement procedures vary by manufacturer but generally involve removing the motor assembly from the awning roller tube and disconnecting electrical connections. New motors must match the original specifications for torque output and mounting configuration to ensure proper operation.
Replacing Torn Awning Fabric and Complete Assembly Removal
Awning fabric replacement becomes necessary when tears, UV damage, or mold contamination affect the material beyond repair. This process requires careful measurement and proper installation techniques to ensure adequate tension and weather protection.
Complete awning assembly removal may be required for major repairs or when replacing both fabric and hardware components. This procedure involves disconnecting electrical connections, removing mounting brackets, and carefully handling the spring-loaded roller assembly.
Professional installation ensures proper tension adjustment and secure mounting that withstands wind loads encountered during travel. Improper installation can lead to awning failure and potential damage to the RV exterior during deployment or retraction.
Roof Vent Replacement and Water Intrusion Prevention
Roof vents eventually require replacement due to cracked housings, failed fan motors, or damaged sealing systems. These repairs demand careful attention to waterproofing to prevent leaks that can cause extensive interior damage.
Replacement procedures involve removing old sealant, unbolting the vent assembly, and installing new units with fresh sealant appropriate for RV roofing materials. Different roof types require specific sealants to ensure long-term weather protection.
Resealing techniques include cleaning old sealant residue, applying primer when required, and installing new sealant in continuous beads to prevent water intrusion. Proper curing time must be observed before exposing repairs to weather conditions.
Frameless Window Replacement Techniques
RV windows use different mounting systems than residential windows, often featuring frameless designs that rely on sealant for weather protection. Replacement requires understanding these unique mounting methods and proper sealing procedures.
Sealing methods for RV windows include butyl tape for initial installation and lap sealant for long-term weather protection. These materials must remain flexible to accommodate the thermal expansion and structural movement that RVs experience during travel.
Proper installation involves cleaning mounting surfaces, applying sealant in correct patterns, and securing windows with appropriate fasteners. Over-tightening can crack window materials, while insufficient fastening allows air and water infiltration.
RV Caulking Best Practices and Exterior Weatherproofing
Annual caulking maintenance prevents water intrusion that causes expensive structural damage and interior problems. This preventive maintenance requires identifying all exterior penetrations and systematically inspecting sealant condition.
Weather protection strategies include using high-quality marine-grade sealants designed for mobile applications and UV resistance. Standard household caulks often fail quickly under the stress and movement that RV applications demand.
Application techniques include cleaning preparation surfaces, cutting sealant tips for proper bead size, and tooling joints for optimal adhesion and appearance. Temperature and humidity conditions affect curing, requiring appropriate weather conditions for lasting repairs.
Installing and Maintaining Insect Screens
Insect screens improve comfort by allowing ventilation while excluding bugs, but these components require regular maintenance and eventual replacement. Screen materials vary in durability and effectiveness, with specialty RV screens offering better longevity than standard residential products.
Installation procedures include measuring openings accurately, cutting screen materials with appropriate tools, and securing screens with fasteners or clips designed for mobile applications. Proper installation prevents screen damage during travel while maintaining effective insect protection.
Maintenance includes regular cleaning to remove accumulated debris and inspection for tears or loose mounting hardware. Small tears can be repaired with screen patches, while extensive damage requires complete screen replacement to maintain effectiveness.
Mobile RV Repair Services
The growing demand for mobile rv repair reflects the changing needs of modern rv owners who value convenience and want to avoid the hassle of traditional service center visits. Understanding the benefits and limitations of mobile services helps owners make informed decisions about their repair and maintenance needs.
Benefits of On-Site RV Repair Services
Mobile repair services eliminate the need to drive large recreational vehicles to service centers, saving time and reducing the stress of navigating unfamiliar areas with oversized vehicles. This convenience becomes particularly valuable when dealing with mechanical problems that affect drivability or safety.
Towing costs for large RVs can easily exceed $500 for short distances, making mobile repair economically attractive even for relatively minor problems. Mobile technicians can often perform repairs at a fraction of the total cost when towing and shop time are factored into traditional service approaches.
Shop wait times at busy RV service centers can extend repairs by days or weeks, particularly during peak travel seasons. Mobile services typically offer faster response times and can complete many repairs the same day, minimizing disruption to travel plans.
Service Availability at Various Locations
Campground service calls allow rv owners to continue enjoying their vacation while repairs are completed nearby. Many mobile technicians coordinate with campground management to ensure adequate workspace and proper disposal of waste materials generated during repairs.
Driveway service provides the ultimate convenience for owners who store their RVs at home and need maintenance or repairs completed before departure. This service model allows owners to be present during repairs and ensures their RV is ready for immediate use.
Roadside emergency services can get stranded travelers back on the road quickly when mechanical failures occur away from service centers. These services focus on essential repairs needed to reach safe destinations rather than comprehensive maintenance or complex rebuilds.
RVIA & RVTI Certified Technician Qualifications
Certified technicians bring specialized training in RV systems that general automotive mechanics may lack. This expertise becomes crucial when working on propane systems, slide-out mechanisms, and other components unique to recreational vehicles.
Insurance coverage provided by reputable mobile service companies protects customers from liability during repairs and ensures proper coverage for any accidental damage that might occur during service calls.
Professional mobile services maintain relationships with parts suppliers that enable faster acquisition of components needed for common repairs. This supply chain access reduces repair delays compared to DIY approaches that may require extended parts searches.
Regional Service Areas and Coverage
Tucson, AZ mobile services cater to the large population of full-time RVers and seasonal residents who need reliable maintenance support. The concentration of RV owners in this region supports multiple mobile service providers with varying specialties and capabilities.
Northern Arizona coverage extends to popular winter destinations where many RV owners spend extended periods. Mobile services in these areas often focus on seasonal maintenance needs and preparation for return trips to northern climates.
Mt Lemmon regional services address the unique challenges of RV ownership in areas with harsh winter conditions and seasonal storage requirements. These services often specialize in winterization and preparation procedures needed for cold climate storage.
Emergency Repair Services and Response Times
Stranded RV emergency services prioritize safety-related repairs that enable continued travel to appropriate service facilities. These rapid response services focus on essential systems like brakes, steering, and lights that affect road safety.
Urgent maintenance needs arise when critical systems fail during extended travel periods or in remote locations. Mobile services can often provide temporary solutions that allow safe operation until comprehensive repairs can be completed.
Response time expectations vary by service provider and location, with established mobile services typically offering same-day or next-day response for most non-emergency situations. Emergency calls may receive faster response depending on technician availability and proximity.
RV Winterization and Seasonal Maintenance
Seasonal maintenance schedules protect RV investments and prevent expensive damage from freezing temperatures, UV exposure, and extended storage periods. Proper winterization and preparation procedures extend equipment life and ensure reliable operation when travel resumes.
Step-by-Step Winterization Procedures
Plumbing system winterization prevents freeze damage that can destroy expensive components throughout the water system. This process begins with draining all water tanks and systematically removing water from every line and fixture in the RV.
Appliance winterization includes specific procedures for water heaters, ice makers, and washing machines that contain water in internal components. Each device requires individual attention to ensure complete water removal and proper preparation for freezing temperatures.
The winterization process concludes with adding RV antifreeze to all drain traps and toilet systems to prevent damage from any residual water that wasn’t completely removed during the draining procedures.
Draining Procedures and Antifreeze Application
Water tank draining requires opening all drain valves and using the water pump to clear lines of residual water. Gravity draining alone doesn’t remove all water from the complex network of supply lines found in modern RV plumbing systems.
Antifreeze application involves introducing proper RV antifreeze through the water system using either the built-in winterization valve or by connecting to the water pump intake. This process forces antifreeze through every line and fixture to provide complete freeze protection.
Proper antifreeze quantities depend on the size and complexity of the RV plumbing system, with most units requiring 2-4 gallons of RV antifreeze for complete protection. Using automotive antifreeze is dangerous and can contaminate the potable water system permanently.
Annual Service Schedules for Major Systems
Furnace annual service should occur before each heating season to ensure safe and efficient operation. This maintenance includes cleaning burner assemblies, testing safety systems, and verifying proper combustion air flow through the unit.
Water heater maintenance schedules vary by usage but typically require annual inspection of electric elements, anode rods, and gas burner components. Hard water areas may require more frequent service to remove mineral deposits that reduce efficiency.
Cooling system annual service includes cleaning air conditioner coils, replacing air filters, and testing refrigerant levels in sealed systems. These procedures maintain efficiency and prevent costly compressor damage from restricted airflow or contamination.
Preventative Maintenance Checklists
Electrical panel maintenance includes checking all connections for corrosion, testing circuit breakers under load, and verifying proper ground connections throughout the system. Annual inspection can prevent failures that leave travelers without power in remote locations.
Connection maintenance involves inspecting every electrical connection for signs of overheating, corrosion, or looseness. The vibration and temperature cycling that RVs experience accelerates connection degradation compared to stationary installations.
Documentation of maintenance activities provides valuable records for warranty claims and helps establish patterns that indicate developing problems before they cause breakdowns during travel.
Battery Maintenance and Replacement Cycles
Battery life extension requires regular maintenance including cleaning terminals, checking electrolyte levels in serviceable batteries, and maintaining proper charging cycles. Batteries represent a significant expense that proper care can help avoid prematurely.
Replacement cycles typically range from 4-6 years for house batteries depending on usage patterns and maintenance quality. Monitoring battery performance helps determine optimal replacement timing before failure occurs during travel.
Storage procedures for batteries include maintaining proper charge levels and protecting from extreme temperatures that accelerate degradation. Proper storage can extend battery life significantly compared to neglected units.
Professional RV Repair vs DIY Solutions
Deciding between professional repair services and DIY approaches requires careful consideration of safety, complexity, warranty implications, and cost factors. Understanding when to tackle repairs yourself and when to call certified technicians can save money while ensuring work is completed safely and effectively.
When to Call Professional Technicians
Complex electrical system repairs involving 120V AC circuits, converter replacement, or electrical panel modifications require certified technicians due to fire and shock hazards. Professional expertise ensures proper installation and compliance with electrical codes that protect both the RV and its occupants.
Gas system work demands professional attention due to the serious safety implications of improper propane repairs. Certified technicians understand proper leak testing procedures, pressure specifications, and safety protocols that prevent potentially fatal accidents.
Warranty implications of self-performed repairs can void manufacturer coverage for expensive components like slide-out systems, generators, and appliances. Professional service typically includes warranty protection that DIY repairs cannot provide.
DIY-Friendly Repairs and Basic Maintenance
Filter changes represent some of the most cost-effective DIY maintenance tasks that RV owners can perform. Air conditioner filters, water filters, and furnace filters are designed for user replacement and require only basic tools and knowledge.
Basic maintenance tasks like battery terminal cleaning, exterior light bulb replacement, and awning fabric cleaning can be safely performed by most owners with appropriate tools and safety precautions.
Minor adjustments to cabinet doors, slide-out adjustments within manufacturer specifications, and routine lubrication of mechanical components fall within the capabilities of mechanically-inclined owners following proper procedures.
Safety Considerations for System Modifications
Propane system modifications require certified technicians due to the specialized knowledge needed for safe installation and testing. Improper gas work can create explosive conditions that endanger lives and property.
Electrical modifications beyond simple fixture replacement should involve qualified electricians familiar with RV electrical systems and grounding requirements. Mobile environments create unique electrical challenges that differ from residential applications.
Structural modifications can affect RV safety ratings and insurance coverage. Professional engineering input may be required for significant modifications that alter the vehicle’s structural integrity or weight distribution.
Warranty Protection and Service Documentation
Professional service documentation provides essential records for warranty claims and insurance purposes. Detailed service records help establish proper maintenance history and can affect resale value significantly.
Manufacturer warranty requirements often specify professional installation or service for certain components. Understanding these requirements before beginning DIY projects prevents inadvertent warranty voiding.
Insurance coverage may require professional installation for certain modifications or repairs. Checking with insurance providers before beginning major projects prevents coverage issues that could prove costly later.
Cost Comparison Analysis
Mobile repair services typically cost less than traditional service center visits when towing, lodging, and lost time are considered. This cost advantage makes professional service attractive even for moderately complex repairs.
Traditional RV service centers offer comprehensive diagnostic capabilities and parts inventory that may be required for complex problems. These facilities can handle major rebuilds and warranty work that mobile services cannot provide.
DIY cost savings become significant for routine maintenance and simple repairs, but the investment in proper tools and training materials must be factored into the overall cost analysis. Some specialized tools may cost more than hiring professional service for infrequent repairs.
Labor rates at professional RV service centers typically range from $130 to $220 per hour, making DIY approaches attractive for time-consuming but straightforward procedures. However, the risk of causing additional damage through improper repair techniques can quickly eliminate any cost savings.
The decision between professional and DIY approaches should consider the owner’s skill level, available time, tool investment, safety implications, and warranty requirements. A balanced approach using professional services for complex or dangerous work while handling routine maintenance personally often provides the best combination of safety, cost control, and system reliability.
Successful RV ownership requires understanding your vehicle’s systems, recognizing your personal limitations, and building relationships with qualified professionals who can handle work beyond your expertise. This approach ensures your rv continues to provide reliable service while maintaining safety and protecting your investment for years of enjoyable travel.
Proper maintenance, whether performed professionally or as DIY projects, extends equipment life and prevents minor issues from becoming major failures. Keeping detailed records of all service work, using quality parts and materials, and following manufacturer recommendations helps ensure your recreational vehicle remains ready for whatever adventures lie ahead on the road.