
Few things ruin a camping trip faster than an RV air conditioner that blows air but never gets cold. The fan hums along, the vents push air into the camper, and yet the temperature inside barely budges. Before you assume the whole unit is toast, know this: the fix is usually simpler and cheaper than you think. This guide walks you through every likely cause, from a clogged filter to a faulty capacitor, so you can get cool air flowing again.
Key Takeaways
Your RV air conditioner fan may run just fine while the system fails to deliver cold air. In the vast majority of cases, the culprit is something accessible-a dirty filter, grimy coils, a weak capacitor, or an airflow leak-not a catastrophic compressor failure. A clogged air filter is the most common cooling issue, and you can check it in under two minutes.
Here are the first things to do today:
Verify the thermostat is set to “Cool” (not “Fan Only”) with the setpoint at least 5–7°F below current inside temperature.
Pull out and inspect the interior air filter for dust and debris buildup.
Check for ice on the evaporator coil by looking above the filter behind the return grille.
Listen for the compressor starting about 30–90 seconds after the fan kicks on.
Climb up and inspect the rooftop condenser coils for leaves, dirt, or debris blocking airflow.
Safety warning: Always shut off shore power and flip the AC breaker to “Off” before removing the roof shroud or touching any electrical parts on the ac unit.
Dirty filters, dirty coils, and airflow leaks account for far more “AC runs but doesn’t cool” calls than low refrigerant or failed compressors. That said, if you suspect a refrigerant leak, a failing compressor, repeated breaker trips, or you’re uncomfortable working with 120V power, call an RV or HVAC professional such as a mobile RV repair service in Tucson, AZ.
How an RV Air Conditioner Should Work (In Plain English)
Warm interior air gets pulled through a blower and passes over the evaporator coil, where liquid refrigerant absorbs heat and turns into vapor. The compressor then pressurizes that vapor and pushes it up to the rooftop condenser coils, where a second fan dumps the heat outside. The refrigerant cools back into a liquid, cycles through an expansion device, and returns to the evaporator to absorb more heat. That loop repeats continuously.
Here’s a quick breakdown of the major components:
Compressor – pressurizes refrigerant; if it doesn’t start, you get fan but no cooling.
Evaporator coil – absorbs heat from cabin air on the interior side.
Condenser coils – reject heat to the outside air on the roof.
Fan motors – one blower inside, one condenser fan outside; both needed for proper airflow.
Capacitor – stores electrical charge to help the compressor and fan motors start.
Thermostat and control board – reads temperature, signals the compressor to engage.
If the fan runs but the ac system doesn’t cool, the problem nearly always falls into one of three buckets: restricted airflow, coil or refrigerant condition, or compressor/capacitor/electrical failure. This applies equally to popular brands like Dometic and Coleman Mach RV air conditioners-same principles, different housings and controls.
Quick Checks: Rule Out the Simple Stuff First
Before you climb on the roof or start pricing a new ac unit, run through this fast checklist. It takes about 15 minutes and catches the most common oversights.
Thermostat mode and setpoint: Set to “Cool,” fan on “Auto,” temperature at least 5–7°F below the current reading. Sounds obvious, but a thermostat accidentally left on “Fan Only” blows air without engaging the compressor.
Power quality: Low voltage from campground power can cause the fan to run without cooling. Confirm your RV is plugged into shore power or a properly sized generator, check that no breaker has tripped in the panel, and verify your surge protector or EMS isn’t showing a low-voltage warning. RV air conditioners require a stable power supply for proper operation-ideally a full 120V. Below roughly 110V, the compressor struggles to start. Use a surge protector to prevent power spikes to the AC unit.
Interior vents: Make sure all supply vents are open, the return/intake grill on the ceiling isn’t blocked by furniture or bedding, and nothing is covering the ceiling assembly.
Measure the temperature difference: Run the air conditioner for 15 minutes and hold a thermometer at the return grille, then at the closest supply vent. A noticeable temperature drop between return air and supply vent indicates proper cooling function. You’re looking for roughly an 18–22°F difference. An RV air conditioner should produce a 20-degree temperature difference when running correctly. If you’re seeing less than 15°F, keep reading.
Dirty or Clogged Interior Air Filter
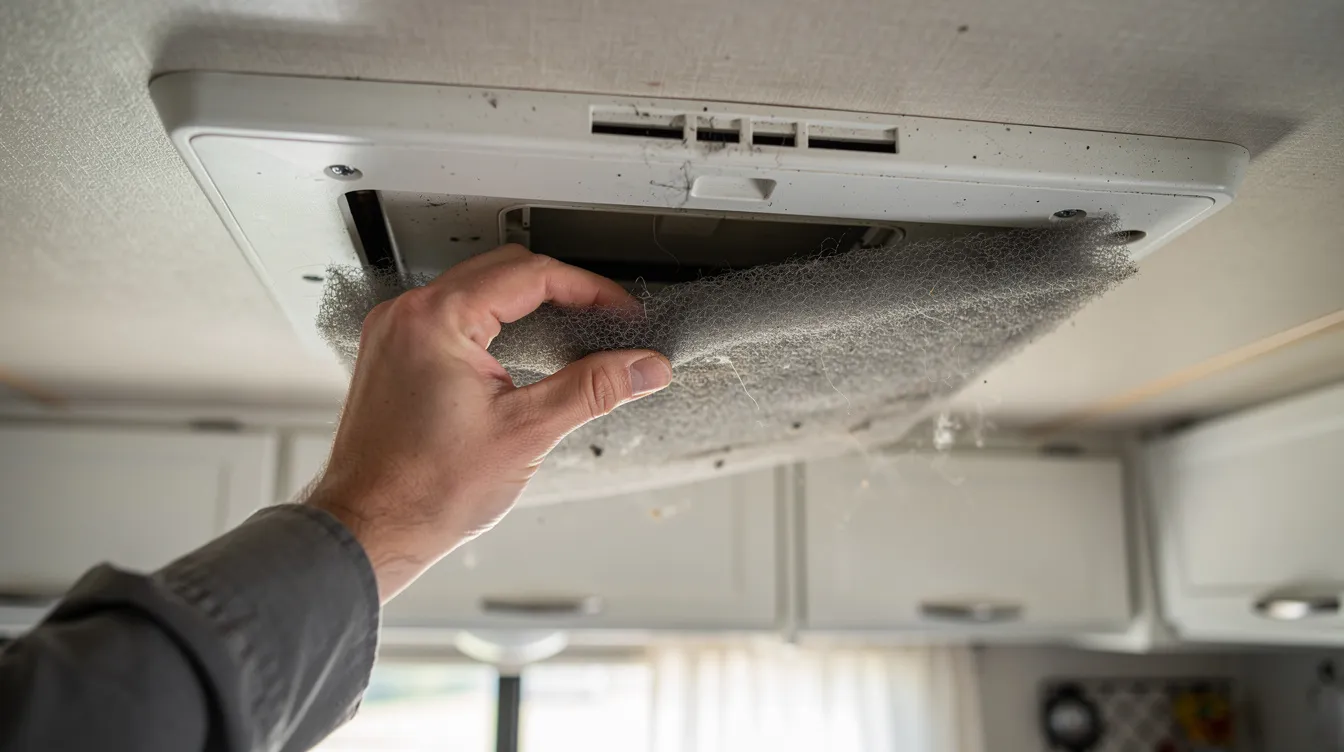
A clogged air filter is the most common cause of poor cooling. When the return is choked with dust, pet hair, or pollen, less warm air reaches the evaporator coil. The coil can then drop below freezing and ice up, and the air coming from your vents feels weak or lukewarm even though the fan runs at full speed.
The filter is usually located behind the plastic return grille on the ceiling assembly inside the RV-most ducted units have two foam or mesh filters that pull straight down.
How to clean them:
Flip the AC breaker off.
Remove the ceiling grille (usually held by tabs or a couple of screws).
Pull out both filters.
Inspect for heavy dust buildup or damage.
Wash with warm soapy water, rinse, and let them air-dry completely before reinstalling.
Clean or replace air filters every 2–4 weeks during use, especially when camping in dusty locations like Arizona or West Texas. If the foam is crumbling, torn, or moldy, replace it with OEM or correctly sized aftermarket filters to protect the evaporator coil from accumulating dirt.
Dirty Evaporator Coil or Rooftop Condenser Coils
Dust, pollen, and road grime on evaporator and condenser coils act like a blanket of insulation. Cleaning the evaporator and condenser coils improves cooling efficiency significantly. Dirty evaporator coils can reduce cooling capacity even when the fan is blowing strong, and dirt on rooftop condenser coils prevents heat from exhausting outside-forcing the compressor to work harder for less result.
Inspecting the evaporator coil: Remove the return grille and air filter, then shine a flashlight up into the coil fins. Look for matted dust and fuzz coating the metal surfaces.
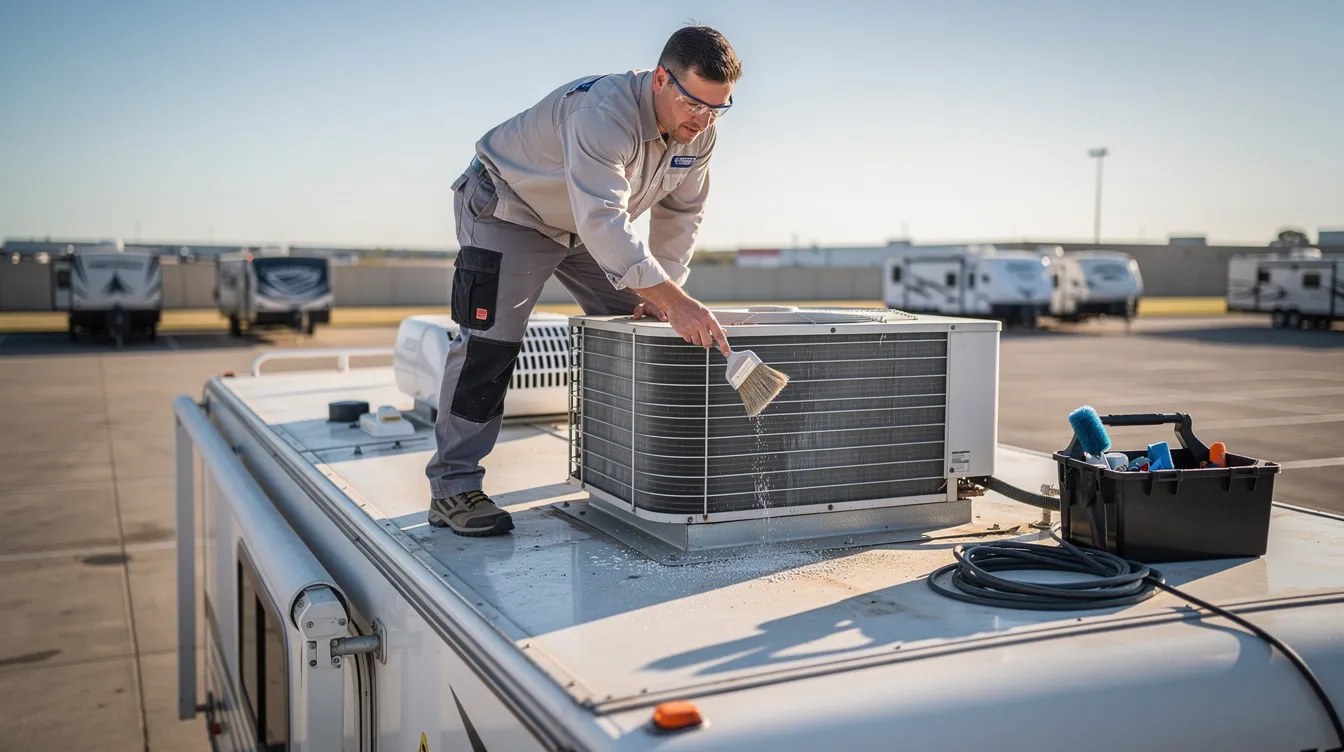
Accessing the rooftop condenser coils: Disconnect power completely. Climb to the roof, remove the AC shroud (usually held by screws or clips), and locate the outside-facing condenser coil that wraps around part of the rooftop unit.
Cleaning guidance:
Use a soft brush to loosen debris, then rinse with low-pressure water or a non-acid coil cleaner.
Always brush condenser fins straight to avoid bending them. Bent fins restrict airflow just like dirt does.
Never use a pressure washer-it will crush the delicate fins.
Check that condensate drainage paths are clear so water doesn’t pool in the drain pan.
A dirty condenser coil is one of the top reasons the AC runs but the air only feels lukewarm. If the condenser fan area feels extremely hot while running, and the compressor runs almost nonstop on a 90–100°F day, grimy coils are a strong suspect. Clean condenser coils at the start of each camping season as part of your annual prep.
Frozen Evaporator Coil: When the AC Ices Up and Blows Warm
Frozen evaporator coils hinder cooling efficiency in an RV air conditioner. Typical signs include suddenly reduced airflow, vents blowing only room-temperature air, and visible frost or ice on the evaporator coil-sometimes you’ll even see water dripping from the ceiling assembly.
Common causes of a freeze:
Clogged air filter (most frequent trigger-ice build-up on evaporator coils indicates airflow issues)
Blocked return vents
Running the fan on the lowest speed setting
Operating RV AC units in ambient temperatures below roughly 60°F
Low refrigerant level
How to thaw completely:
Switch the air conditioner to “Fan Only” mode.
Set the thermostat higher or turn “Cool” off entirely.
Leave interior doors and vents open to promote good airflow across the coil.
Wait several hours-do not rush this. Ice must melt fully before restarting in cooling mode.
After the coil thaws, clean the air filter and confirm nothing is blocking the return before turning the system back to cool. If freezing comes back quickly despite clean filters and unrestricted airflow, low refrigerant or a metering device issue is likely, and you’ll need a technician.
Low Refrigerant: What You Can (and Can’t) Do Yourself
Most RV air conditioners are sealed systems and typically do not need periodic refrigerant charging. Factory units are charged at the plant and that refrigerant doesn’t get “used up.” Low refrigerant levels can cause an RV AC to blow warm air, but if the charge is low, it almost always means there’s a refrigerant leak somewhere in the system.
Signs of low refrigerant:
The AC runs continuously without reaching set temperature
Only mildly cool air at the vents
Ice forming on the evaporator coil
Possible hissing sound from the refrigerant lines
What you can’t do yourself: In the U.S., adding refrigerant to air conditioning systems requires EPA Section 608 certification. Many rooftop RV units-especially older R-22 models-lack service ports entirely and are treated as non-serviceable. R-22 (often called freon) is largely phased out, making reclaimed supply expensive.
Repair vs. replacement: If the unit is under roughly 8–10 years old and uses modern refrigerant like R-410A, a certified tech may be able to add service ports, find the leak, and recharge. For an older unit running R-22 from the early 2000s, the cost of retrofit and recharge often approaches the price of a brand-new rooftop unit. Get a firm written estimate before authorizing any refrigerant work, and compare it to replacement cost.
Capacitors, Compressors, and Other Electrical Causes
A run or start capacitor stores an electrical charge that helps the compressor and fan motors start and run efficiently. A failing capacitor can prevent the compressor from starting entirely-so the fan spins, air moves, but no cooling happens because the compressor never engages.
Faulty capacitor symptoms:
Fan blowing but only warm air
A humming or clicking sound from the rooftop unit when cooling should start
Occasional tripped breakers
A visibly bulged or leaking metal can when you inspect inside the shroud
Testing a capacitor (high-level): With power off, discharge the capacitor using an insulated resistor or proper discharge tool. Remove the wires, then use a multimeter set to microfarad (μF) to compare the reading against the label value. Typical compressor-side capacitors range from 20–60 μF. Replacement capacitors generally cost $15–$30 for the part alone.
A failed compressor often necessitates a new AC unit. Symptoms include loud buzzing, grinding, or repeated start attempts. On RV air conditioners older than 10 years, compressor replacement rarely makes financial sense-the labor and parts approach the price of a whole unit. Some modern control boards on Coleman Mach and Dometic units also display error codes that help pinpoint electrical system faults.
If you’re not comfortable with 120V electrical work or handling capacitors that retain a charge, call an RV technician or a mobile RV repair service like RV Repair Hero. The shock risk is real.
Airflow Leaks, Duct Issues, and Undersized Units
Even a perfectly healthy air conditioner can struggle if cold air leaks into the roof cavity before reaching your living space. Air leaking between return and supply sides reduces cooling efficiency in RVs more often than most owners realize.
Common ducted RV problems:
Deteriorated foil tape on ceiling ducts
Gaps where ducts meet ceiling vents
Damaged foam splitters that separate intake and exhaust inside the ceiling assembly
Simple inspection: Remove the interior cover and look for gaps where you see daylight or feel cold air escaping into the roof plenum. Reseal with foil HVAC tape and new foam weatherstripping-cheap materials, big difference.
For non-ducted units, check that the divider foam between intake and discharge is intact. If it’s missing or compressed, cold discharge air gets sucked straight back into the return, and you feel only lukewarm air below.
Sizing matters too. A single 13,500 BTU RV AC may be undersized for a 35–40 ft rig with large slide-outs in peak summer heat. If the system cools fine on 75–80°F days but can’t keep up during warm weather above 95°F, capacity-not a broken unit-may be the real issue. Most RV air conditioners can lower interior temperatures by 15°F to 20°F relative to outside temperature, so expecting meat-locker cold in a poorly insulated house on wheels sitting in full sun is unrealistic.
Unusual Noises, Smells, and Other Warning Signs
New unusual noises or odors when the AC runs are diagnostic clues that often tie directly to poor cooling performance.
Sound / Smell | Likely Cause | Action |
|---|---|---|
Buzzing or humming | Locked compressor or faulty capacitor | Check capacitor; call tech if compressor |
Rattling | Loose screws, debris in shroud | Inspect and tighten; remove debris |
Grinding or squealing | Failing fan motor bearings | Replace fan motor |
Musty or sour smell | Mold on evaporator coil or in drain pan | Clean with indoor-rated coil cleaner; clear drain |
Burning or electrical smell | Wiring or motor failure | Shut the system down immediately; call a pro |
A quick rooftop inspection can also reveal wasp nests, leaves, or other debris caught near the condenser fan that create both noise and restricted airflow. If you notice a burning smell, shut everything down and call a professional-do not attempt to fix wiring issues yourself. |
Safety Tips Before You Climb on the Roof or Open the AC
RV air conditioners combine 120V electricity, sharp metal condenser fins, and roof work at height. Basic safety steps are non-negotiable.
Electrical: Disconnect shore power, turn off the generator, switch the interior AC breaker to “Off,” and verify the unit will not start before touching anything.
Roof access: Only climb up on stable, level ground. Avoid wet or icy conditions. Wear non-slip shoes and stay clear of edges while working around the rooftop unit.
Capacitor safety: Capacitors can retain a dangerous charge even with power off. Discharge them properly with insulated tools. If you haven’t done this before, skip this step and let a technician handle it.
Use a surge protector plugged into the campground pedestal to protect against power spikes that can damage the electrical system and control board.
Stop and call an RV or HVAC technician whenever you feel unsure-especially when dealing with refrigerant lines, compressor wiring, or the control board-or schedule a mobile RV repair service in Marana, AZ if you’re in that area.
When to Repair, When to Replace Your RV Air Conditioner
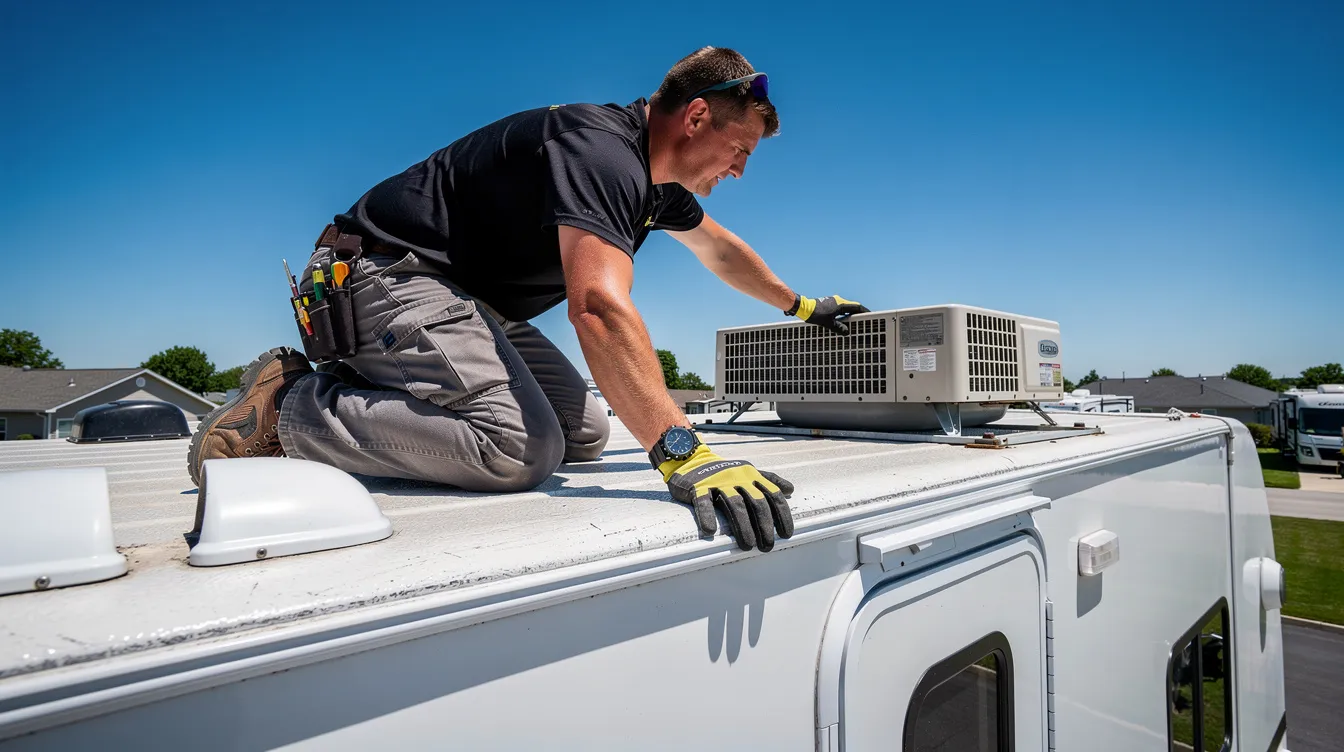
This is ultimately a cost-benefit decision based on the age of the unit, the severity of the problem, and how you use your RV-full-time living versus occasional weekend trips.
Repairs that usually make sense:
Replacing a capacitor ($15–$30 in parts)
Swapping a fan motor
Thorough cleaning of evaporator and condenser coils
Resealing duct and plenum leaks
Repairing minor issues is often cost-effective for newer units still under warranty or less than 8 years old.
When replacement is often wiser:
A failed compressor on an older unit (10+ years)
Repeated refrigerant leak in an R-22 system
Cracked housing causing chronic water intrusion
A chronically undersized AC that never kept up in summer
Replace if repair costs exceed 50 percent of a new unit. Consider replacement if the unit is over 10 years old, since new units are more efficient and reliable than older models. When shopping for a replacement, factor in energy efficiency, warranty coverage, noise level, and compatibility with your existing roof opening and ductwork. Try to schedule a replacement before peak summer travel season so parts and professional installation are easier to line up.
Preventive Maintenance Schedule for RV Air Conditioners
A simple maintenance routine can prevent most “RV AC runs but doesn’t cool” problems before they strand you in hot weather.
Before each camping season:
Clean interior filters
Inspect and clean evaporator and condenser coils
Check mounting bolts on the roof
Look for deteriorated foam or tape in the duct plenum
Inspect rooftop seals around the AC unit periodically-failed gaskets let water damage both the air conditioner and the RV ceiling structure
Monthly during heavy use (June–August):
Clean or rinse filters
Visually check for ice buildup on the evaporator
Listen for unusual noises at startup
Compare the thermostat reading against an independent thermometer
Every 1–2 years (or annually for full-timers):
Schedule an annual inspection with a certified RV technician for electrical tests, refrigerant pressure checks, and thermostat calibration
Have a tech inspect the heat pump mode (if equipped) before winter travel
Frequently Asked Questions
Why is my RV AC blowing air but not cold specifically when it’s very hot outside?
In hot weather, RV air conditioners may struggle to provide adequate cooling because marginal issues-slightly dirty coils, a weak capacitor, or undersized BTU capacity-become painfully obvious once ambient temperatures climb past 95°F. The system may cool acceptably on mild days but fall behind in a heatwave. Measure the temperature drop across your air conditioner on a hot afternoon. If it’s under roughly 15°F even after cleaning filters and coils, the unit may be underperforming or simply undersized for your RV.
Can I add a soft start device to help my older RV air conditioner cool better?
A soft start kit doesn’t increase cooling capacity. What it does is reduce compressor inrush current by 60–75%, helping the unit start more reliably on generators or 30-amp hookups. More reliable starts can indirectly improve comfort by preventing nuisance trips and short-cycling, but coil cleaning and air sealing are still what you need for better actual cooling output.
How do I know if my Coleman Mach or similar RV AC compressor is actually running?
After the fan starts, the compressor usually kicks in within 30–90 seconds. You’ll notice a change in sound-a deeper hum-and lights may dim slightly from the inrush current. Within a few minutes, the condenser area on the roof should feel warm to the touch as heat exhausts outside. If the fan runs continuously with no sound change, no warm exhaust outside, and no temperature drop at the vents, the compressor likely isn’t starting. A faulty capacitor or compressor issue is the most probable cause.
Is it normal for my RV AC to cycle on and off frequently?
In a properly sized and tuned system, the compressor should run for at least 10–15 minutes per cycle during warm weather. Very short cycles of 1–3 minutes point to thermostat placement issues (supply vents blowing directly on the sensor), oversizing, or electrical problems. Recalibrate or replace older mechanical thermostats, and consult a technician if short-cycling continues.
What’s the maximum temperature drop I should realistically expect from my RV air conditioner?
Most rooftop RV AC units are designed for roughly an 18–22°F temperature drop between return air and supply air under normal conditions. For example, if it’s 95°F at the return, well-functioning air conditioners will usually deliver around 73–77°F at the vents. Most RV air conditioners can lower interior temperatures by 15°F to 20°F relative to outside temperature-so if it’s 100°F outside, reaching 80–85°F inside a well-maintained rig is realistic. Expecting ice-cold temperatures in a poorly insulated RV parked in full sun simply isn’t how these systems are designed to perform.