Keep your cool on the road! Our Ultimate Guide to Camper AC Repair offers essential tips to ensure a refreshing ride, no matter the heat outside.
Understanding Camper AC Systems
Understanding how your camper’s AC system works is the first step in ensuring a cool and comfortable journey. Camper air conditioning systems are generally similar to those in homes and cars but are specifically designed to handle the unique requirements of mobile living spaces. The primary function of your camper’s AC system is to remove heat and humidity from the interior, creating a pleasant environment even when the temperature outside is soaring.
Most camper AC systems are rooftop units, which are compact and efficient, designed to fit seamlessly into the limited space available. These systems consist of several key components: the compressor, condenser, evaporator, and refrigerant. The compressor pumps refrigerant through the system, where it absorbs heat from the inside air at the evaporator and releases it outside at the condenser. Fans then circulate the cooled air throughout the camper.
Understanding these components and their functions is crucial for diagnosing and repairing any issues that may arise. By familiarizing yourself with how your AC system operates, you’ll be better prepared to tackle common problems and keep your camper cool and comfortable on all your adventures.
Common AC Problems in Campers
Even the best-maintained camper AC systems can encounter issues over time. Some common problems include inadequate cooling, strange noises, water leaks, and foul odors. Identifying these problems early can help you address them before they escalate into more significant issues.
Inadequate cooling is one of the most frequent complaints from camper owners. This issue can be caused by several factors, including a dirty air filter, low refrigerant levels, or a malfunctioning compressor. If your AC system is struggling to keep your camper cool, it’s essential to investigate these potential causes and address them promptly.
Strange noises coming from your AC unit can be alarming, but they often indicate a specific problem that can be resolved with some troubleshooting. Common noises include buzzing, rattling, or grinding sounds, which may be caused by loose components, a failing motor, or debris in the unit. By identifying the source of the noise, you can take the necessary steps to fix the issue and restore your AC system to proper working order.
Water leaks are another common issue with camper AC systems. These leaks can occur when the condensate drain line becomes clogged or when the unit is not properly sealed. Addressing water leaks promptly is crucial to prevent water damage to your camper’s interior and to ensure the efficient operation of your AC system.
Tools Needed for Camper AC Repair
Having the right tools on hand is essential for diagnosing and repairing camper AC issues. While some repairs may require specialized equipment, many common problems can be addressed with basic tools that you likely already have in your toolbox.
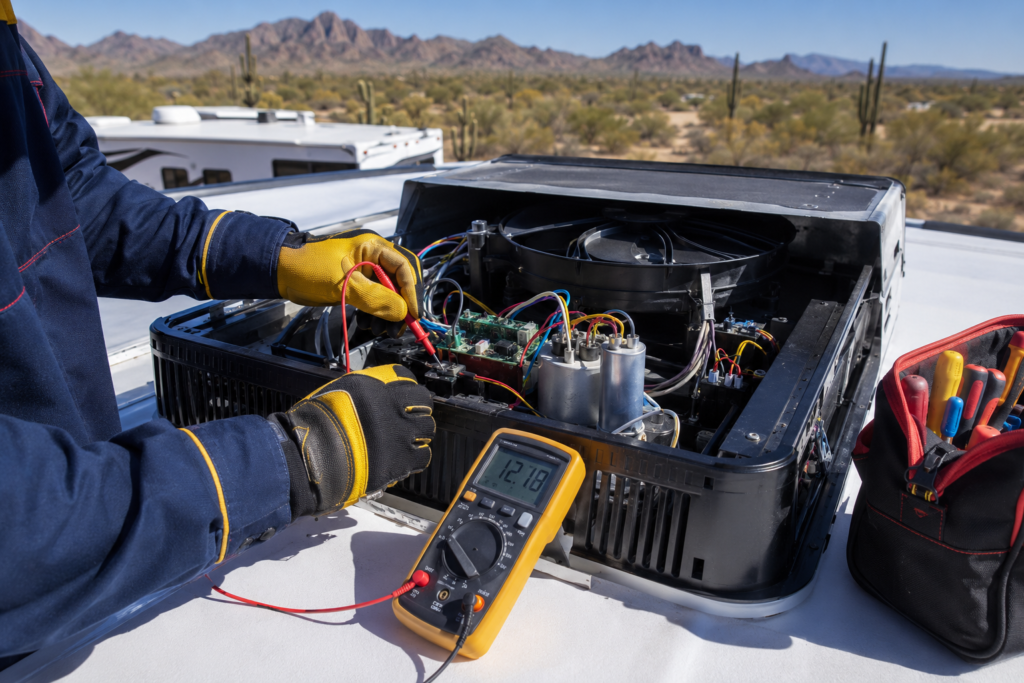
A multimeter is an invaluable tool for diagnosing electrical issues in your camper AC system. This device can measure voltage, current, and resistance, allowing you to identify problems with the electrical components of your AC unit. A multimeter is particularly useful for checking the continuity of wires and testing the functionality of switches and relays.
A set of screwdrivers is another essential tool for camper AC repair. Many components of your AC system are held in place with screws, and having a variety of screwdrivers on hand will enable you to access and remove these components as needed. Phillips and flathead screwdrivers in various sizes are particularly useful for this purpose.
Other useful tools for camper AC repair include a socket set, pliers, and a utility knife. A socket set can help you remove and replace bolts and nuts, while pliers are useful for gripping and manipulating small components. A utility knife is handy for cutting through insulation and other materials that may be obstructing your access to the AC unit.
Step-by-Step Troubleshooting Guide
When your camper’s AC system is not functioning correctly, a systematic troubleshooting approach can help you identify and resolve the issue. Follow these steps to diagnose and fix common AC problems:
- Check the Power Supply: Ensure that your camper is connected to a reliable power source and that the circuit breaker for the AC unit is not tripped. A lack of power is a common cause of AC malfunctions and can often be resolved by resetting the breaker or checking the power connection.
- Inspect the Thermostat: Verify that the thermostat is set to the correct temperature and mode. If the thermostat is not functioning correctly, it may prevent the AC unit from turning on or maintaining the desired temperature. Replace the thermostat batteries if needed and ensure that the thermostat is set to “cool” mode.
- Examine the Air Filter: A dirty or clogged air filter can restrict airflow and reduce the efficiency of your AC system. Remove the air filter and inspect it for dirt and debris. If the filter is dirty, clean or replace it as needed to restore proper airflow.
- Check the Evaporator and Condenser Coils: Dirty coils can impair the heat exchange process and reduce the cooling capacity of your AC unit. Inspect the evaporator and condenser coils for dirt and debris, and clean them using a soft brush or a coil cleaner.
- Inspect the Refrigerant Levels: Low refrigerant levels can prevent your AC system from cooling effectively. Check the pressure of the refrigerant using a gauge set and add refrigerant if necessary. Be sure to follow the manufacturer’s guidelines for the correct type and amount of refrigerant.
- Listen for Unusual Noises: Strange noises can indicate a range of issues, from loose components to failing motors. Identify the source of the noise and take appropriate action, such as tightening screws or replacing worn parts.
- Check for Water Leaks: Inspect the condensate drain line and the seals around the AC unit for signs of water leaks. Clear any obstructions in the drain line and reseal the unit as needed to prevent water damage.
By following these steps, you can systematically identify and address common AC problems, ensuring that your camper remains cool and comfortable.
DIY Repair Tips for Common Issues
For many camper AC issues, you can perform DIY repairs with a bit of know-how and the right tools. Here are some tips for addressing common problems yourself:
Replacing a Dirty Air Filter: If your AC system is not cooling effectively, a dirty air filter may be to blame. To replace the filter, first, turn off the AC unit and remove the cover. Locate the filter and slide it out of its housing. If the filter is reusable, clean it with water and allow it to dry completely before reinstalling it. If the filter is disposable, replace it with a new one. Reinstall the cover and turn the AC unit back on.
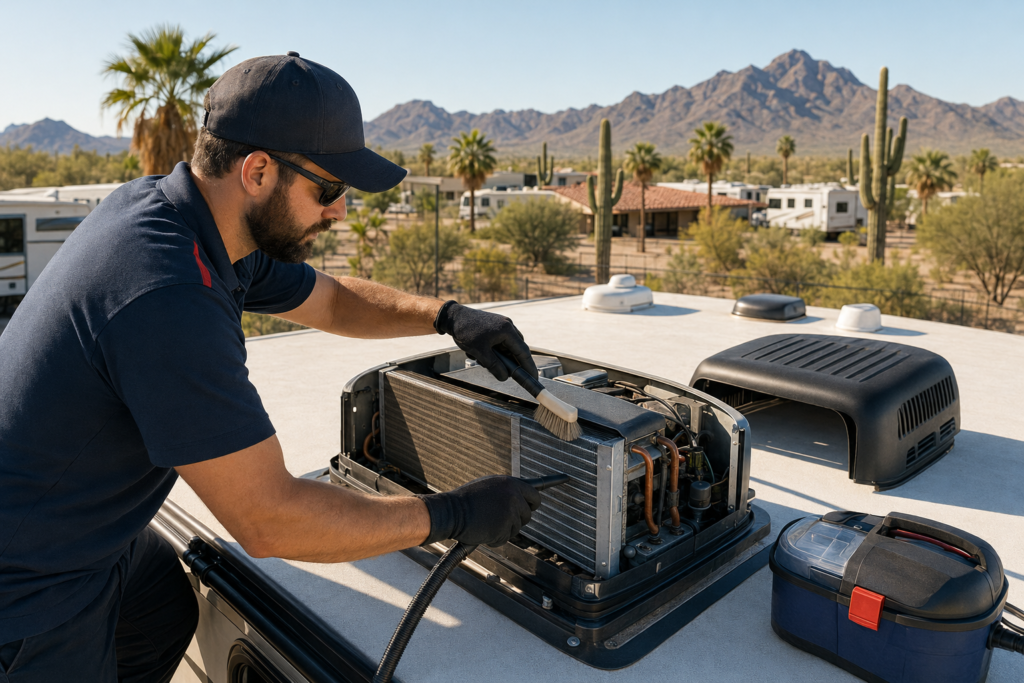
Cleaning the Coils: Dirty evaporator and condenser coils can reduce the efficiency of your AC system. To clean the coils, turn off the AC unit and remove the cover. Use a soft brush or coil cleaner to gently remove dirt and debris from the coils. Be careful not to bend or damage the fins. Once the coils are clean, replace the cover and turn the AC unit back on.
Clearing the Condensate Drain Line: A clogged condensate drain line can cause water leaks and reduce the efficiency of your AC system. To clear the drain line, turn off the AC unit and locate the drain line. Use a wet/dry vacuum to remove any debris or obstructions from the line. If the clog is stubborn, you may need to use a plumber’s snake to clear it. Once the line is clear, turn the AC unit back on and check for leaks.
Checking the Refrigerant Levels: If your AC system is not cooling effectively, low refrigerant levels may be the cause. To check the refrigerant levels, you will need a gauge set. Connect the gauges to the service ports on the AC unit and check the pressure readings. If the readings are low, add refrigerant as needed. Be sure to follow the manufacturer’s guidelines for the correct type and amount of refrigerant.
By addressing these common issues yourself, you can save time and money while ensuring that your camper’s AC system remains in good working order.
When to Call a Professional
While many camper AC issues can be resolved with DIY repairs, there are times when it is best to call in a professional. Recognizing when to seek professional help can save you time, money, and frustration.
Complex Electrical Issues: If you encounter electrical problems that you are not comfortable or experienced in handling, it is best to call a professional. Electrical issues can be dangerous and require specialized knowledge and equipment to diagnose and repair safely.
Refrigerant Leaks: If you suspect that your AC system has a refrigerant leak, it is important to call a professional. Handling refrigerant requires specialized training and equipment, and attempting to repair a refrigerant leak yourself can be hazardous.
Compressor Failures: The compressor is a critical component of your AC system, and if it fails, it can be challenging to replace. A professional technician has the expertise and tools needed to diagnose and replace a faulty compressor safely.
Persistent Problems: If you have tried troubleshooting and repairing your AC system but continue to experience issues, it may be time to call a professional. A qualified technician can perform a thorough inspection and identify any underlying problems that may be affecting your AC system’s performance.
By knowing when to call a professional, you can ensure that your camper’s AC system is repaired correctly and safely, allowing you to enjoy a cool and comfortable ride.
Preventative Maintenance for Your Camper AC
Regular preventative maintenance is key to keeping your camper’s AC system in top condition and avoiding costly repairs. By following a routine maintenance schedule, you can extend the life of your AC unit and ensure that it operates efficiently.
Clean or Replace the Air Filter: The air filter should be cleaned or replaced regularly to ensure proper airflow and prevent dirt and debris from accumulating in the system. Check the filter every month during peak usage and clean or replace it as needed.
Inspect and Clean the Coils: The evaporator and condenser coils should be inspected and cleaned at least once a year. Dirty coils can reduce the efficiency of your AC system, so keeping them clean is essential for optimal performance.
Check the Condensate Drain Line: The condensate drain line should be inspected and cleared of any obstructions regularly. A clogged drain line can cause water leaks and reduce the efficiency of your AC system.
Inspect the Seals: Check the seals around the AC unit for any signs of wear or damage. Replace any damaged seals to prevent air leaks and ensure that your AC system operates efficiently.
Schedule Professional Maintenance: In addition to performing regular DIY maintenance, it is a good idea to schedule professional maintenance at least once a year. A qualified technician can perform a thorough inspection and address any potential issues before they become major problems.
By following these preventative maintenance tips, you can keep your camper’s AC system in excellent condition and enjoy a cool and comfortable ride on all your adventures.
Upgrading Your Camper AC System
If your camper’s AC system is outdated or struggling to keep up with your cooling needs, upgrading to a newer, more efficient unit can make a significant difference. Modern AC units are designed to be more energy-efficient and provide better cooling performance, making them a worthwhile investment for any camper owner.
Choosing the Right Unit: When selecting a new AC unit for your camper, consider factors such as cooling capacity, energy efficiency, and compatibility with your existing setup. The cooling capacity of an AC unit is measured in British Thermal Units (BTUs), and it is important to choose a unit with the appropriate BTU rating for the size of your camper. An undersized unit may struggle to cool your space, while an oversized unit can cycle on and off frequently, reducing efficiency.
Energy Efficiency: Look for an AC unit with a high Seasonal Energy Efficiency Ratio (SEER) rating. The SEER rating measures the efficiency of the unit, with higher ratings indicating better energy performance. A more energy-efficient unit can help you save on energy costs and reduce your environmental impact.
Installation Considerations: Installing a new AC unit in your camper may require some modifications to your existing setup. Depending on the unit you choose, you may need to make adjustments to the mounting location, electrical connections, and ductwork. If you are not comfortable with these modifications, it is best to hire a professional to ensure a proper installation.
Additional Features: Many modern AC units come with additional features that can enhance your comfort and convenience. These features may include programmable thermostats, remote controls, and built-in dehumidifiers. Consider which features are important to you and choose a unit that meets your needs.
Upgrading your camper’s AC system can provide better cooling performance, improved energy efficiency, and enhanced comfort, making your travels more enjoyable.
Cost Estimates for Camper AC Repairs
Understanding the potential costs of camper AC repairs can help you budget for maintenance and avoid unexpected expenses. While the cost of repairs can vary depending on the nature of the issue and the make and model of your AC unit, here are some general estimates for common repairs:
Replacing the Air Filter: Replacing a dirty air filter is one of the most cost-effective repairs you can perform. Air filters typically cost between $10 and $30, depending on the type and size of the filter.
Cleaning the Coils: If you choose to clean the coils yourself, the cost will be minimal, with coil cleaner typically costing around $10 to $20. If you hire a professional to clean the coils, the cost may range from $75 to $150, depending on the extent of the cleaning required.
Clearing the Condensate Drain Line: Clearing a clogged condensate drain line yourself can be done with a wet/dry vacuum, which typically costs around $50 to $100. If you need to hire a professional, the cost may range from $100 to $200.
Refrigerant Recharge: Recharging the refrigerant in your AC system can be more costly, with the refrigerant itself costing around $20 to $50 per pound. The total cost of a refrigerant recharge, including labor, may range from $150 to $400, depending on the amount of refrigerant needed and the labor rates in your area.
Compressor Replacement: Replacing a faulty compressor can be one of the most expensive AC repairs. The cost of a new compressor can range from $400 to $1,200, depending on the make and model of your AC unit. Labor costs for compressor replacement may add an additional $200 to $500, bringing the total cost to $600 to $1,700.
Professional Maintenance: Scheduling professional maintenance for your camper’s AC system can help you catch potential issues early and avoid costly repairs. The cost of professional maintenance typically ranges from $100 to $200, depending on the scope of the service.
By understanding the potential costs of camper AC repairs, you can budget for maintenance and make informed decisions about when to perform DIY repairs and when to call in a professional.
Conclusion and Final Thoughts
Maintaining your camper’s AC system is essential for ensuring a cool and comfortable ride, no matter the heat outside. By understanding how your AC system works, identifying common problems, and following a systematic troubleshooting approach, you can address many issues yourself and keep your AC unit in top condition.
Regular preventative maintenance is key to extending the life of your AC system and avoiding costly repairs. By cleaning or replacing the air filter, inspecting and cleaning the coils, and checking the condensate drain line, you can ensure that your AC unit operates efficiently and effectively.
While many AC repairs can be performed as DIY projects, it is important to recognize when to call in a professional. Complex electrical issues, refrigerant leaks, and compressor failures are best handled by qualified technicians who have the expertise and tools needed to perform safe and effective repairs.
If your camper’s AC system is outdated or struggling to keep up with your cooling needs, upgrading to a newer, more efficient unit can provide better performance and energy savings. By choosing the right unit for your camper and considering factors such as cooling capacity, energy efficiency, and additional features, you can enjoy a more comfortable and enjoyable travel experience.
By understanding the potential costs of camper AC repairs and budgeting for maintenance, you can avoid unexpected expenses and make informed decisions about your AC system. Whether you are performing DIY repairs or hiring a professional, taking care of your camper’s AC system is essential for a cool and refreshing ride on all your adventures.
Keep your cool on the road with our Ultimate Guide to Camper AC Repair, and enjoy the journey with confidence and comfort. Happy travels!